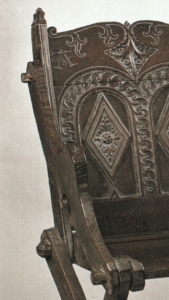
Putting it all together. Probably the most attractive feature of this style of chair is that they were intentionally made to be mobile. The continental chairs that were the probably ancestor of the Glastonbury style folded. Though none of the English interpretations I have seen are capable of folding. However, almost all of them to disassemble. They have pins that stick out from the cross rails that use wedges to hold the whole thing together.
That’s really nice and stands in contrast to some of the travesties I have seen committed to furnituremaking in the SCA where people try to graft portability onto their already shaky notion of how to build a chair (usually a throne). The result is usually wobbly and short lived, not to mention ugly.
So, how do we pin these things together? Some of the medieval examples have rods that pass all the way through the chair. We know this from photos of the disassembled chairs. In the rest? We don’t know and wouldn’t unless we could examine the chair. Likely in ways that would give the docent apoplexy. The alternative is to fix short sections of rod into the cross rails. That’s the way we’ve been building the reproductions.
The trick is sizing the pins. They have to be large enough to be strong enough to be robust, yet small enough to not compromise the structural integrity of the rails into which they are glued. For this version of the chair, it’s complicated by the wood selection. The chair is popular, light and easy to work, fairly strong, but it ain’t oak. The pins are to be walnut for the contrasting color. Walnut is also pretty light and definitely Not Oak.
I am probably overthinking this, but I’d rather not have the chairs fail in service. The right “look” for the pins is around 1-1/4″. That’s asking a lot from 1-1/2″ rails, roughly 1/8″ on either side assuming perfectly placed holes. So my brilliant idea is to use a stepped pin. The part that’s glued into the rails will be 3/4″, thick enough for stability, but thin enough not to compromise the rails. The visible portion of the pins will be 1-1/4″ to give the right look and to have room for the 1/4″ through mortises that receive the wedges.
Cool, now I just need a couple 1-1/4″ walnut dowels. Then, I can turn parts of them down to 3/4″ on the lathe. Even my nascent turning skill should be up to that task. Yeah, no. Problem #1: walnut dowels larger than 1″ are unobtainium. At best, special order at eye-watering prices.
Fine, making dowels isn’t *that* hard. I’ll take some suitably straight grained stock, rough them out on the router table and finish it on the lathe. Adding the stepped portion at the same time. Which brings us to Problem #2: a bit of the suitable size. I have amassed quite a collection of router bits over the years especially for someone that avoids using the router as much as possible. Many of these came from tool auctions. You don’t get a ton of money for used router bits even carbide ones that show little or no use.
So, over the years I have cherry picked a nice collection against the time I needed a particular profile. Now was such a time. Except. I needed a 5/8″ round-over bit and that’s not a common size, I had 3 bits in 1/2″ (aka 4/8ths) and 2 more in 3/4″ (aka 6/8ths) but none in 5/8″, so I had to order one. Fine. That’s what Amazon is for: shit you think you need delivered the next day. Even though I didn’t actually get to it for some time. Rather longer than I imagined, but that’s another story…
Previous | Project Home | Next

